

Is it possible to inject binary files using a USB Rubber Ducky? The device created years ago by Hack5 has the ability to enter a large number of keystrokes into a computer in a short time, but is it possible to enter binary files from the keyboard?
Yes, it is. I tell you how.
Introducción
I have posted something about keyboard related security before, but this time it is different. The purpose of this post is to explain how to inject binary files into a Windows 10 system using the “USB Rubber Ducky” keyboard emulator. While there are several alternative projects, the original USB Rubber Ducky from Hack5 was used to simulate the keyboard keys.
In the image above you can see how Angela from Mr. Robot is using the USB Rubber Ducky. She did that because she has physical access to the computer to be breached but only for 15 seconds. This is the main use for which the USB Rubber Ducky was designed. That of injecting thousands of keys in a few seconds or minutes as if someone is typing at super speed.
The goal was to test if, in addition to typing commands or scripts, binary files could also be injected through the USB Rubber Ducky. Googling around, only a few posts were found commenting that it would be feasible to do, but that it would be very difficult. I could not find any post from someone who had really done it.
What was developed then, was a procedure that allows to inject any arbitrary binary file, in this case, into a Windows 10 machine with Powershell enabled, by simply using the Ducky keyboard emulation.
DISCLAIMER
All information contained in this publication is for educational purposes only. The author or his collaborators are not responsible for any unlawful action that may be taken on the basis of such information.
USB Rubber Ducky
As the vendor states, “The USB Rubber Ducky injects keystrokes at superhuman speeds, violating the inherent trust computers have in humans by posing as a keyboard.“
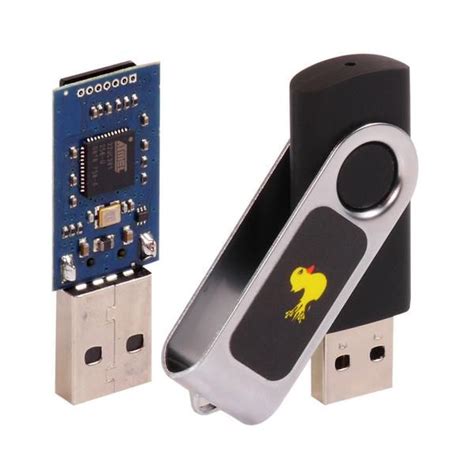
Fig. 1. USB Rubber Ducky
The device looks like a USB flash drive. However, it is in fact a keyboard emulator. This means that it reads the key codes from a micro SD device and sends them to the computer as if it were a human typing. There are a lot of information online of how to use the Ducky and there are lot of published scripts too. In order to use the device you need to follow the next steps:
- Download any USB Rubber Ducky injection coder.
There are several, but in this case the Duck Toolkit was used because it has the language coding that we needed.
- Create the appropriate script in Rubber Ducky USB language
The USB Rubber Ducky language is quite simple, and tells the processor what to do sequentially. Here is a simple example of a script:
REM The next three lines execute a command prompt in Windows
GUI r
DELAY 100
STRING cmd
ENTER
In this example, the commands used behave as follows:
REM: is a comment line, nothing will be done
GUI: is the Windows Key that will be holded with the next key. In this example ‘GUI r’ means, WindowsKey+r (it will popup the windows run… prompt)
DELAY: the system will wait for the tens of milliseconds that follows. In this example, ‘DELAY 100’ means delay 1000 milliseconds, that is 1 second.
STRING: means that the string that follows will be typed as is (in this case it will type ‘cmd’)
ENTER: the Enter key will be pressed
There are more commands in this language, nevertheless, for our purpose, we will use only these ones. This injection script can be saved in a text file, for example: “test.inject.txt“.
- Encode the script with the encoder
Once the script file is created, it needs to be encoded so that the Ducky understands it. It is very important to take into account the keyboard language that the target Windows has configured. It is also convenient to do some tests since the keymap may not match exactly with the encoding sent by the Ducky. Once the encoding is determined, a command like this is executed:
$ducktools.py -e test.inject.txt -l us test.inject.txt.bin
- Remove the micro SD card from the USB Rubber Ducky and plug it to a auxiliary machine. In this case the auxiliary machine was Linux.
- Copy the .bin file from the auxiliary machine to the micro SD card
$cp test.inject.txt.bin /media/.../inject.bin
- Remove the micro SD from the auxiliary machine and plug it back into the USB Rubber Ducky.
- Insert the USB Rubber Ducky in a USB socket of the target machine
- The Ducky will start typing…
Binary Powershell files
There are several ways of creating binary files from an integer string in Powershell. After making several tests, the following option was selected:
[io.file]::WriteAllBytes('<binary file>',$bytecode)
This command line will create a a file named ‘<binary file>‘ based on the bytecode sequence contained in the $bytecode variable.
Therefore, the $bytecode variable must be previously created and filled with the original binary file bytecode sequence. The variable can be created with this simple Powershell command:
$bytecode = <byte 1>,<byte 2>,<byte 3>,...,<last byte>
The original file bytecode sequence can be extracted in a Linux machine with a command like this:
$od -An -tu1 -w1 -v test.exe > test.exe.txt
Nevertheless, in this case, in order to make things easier, a python script was developed.
Creation of an injection file
A small python script named bin2duck was created in order to read the bytecode sequence of the original binary file, and create an USB Rubber Ducky script file. The python script can be downloaded here.
In the following section, the tutorial of the complete process of injecting a binary file to a Windows 10 machine with Powershell enabled via Rubber Ducky USB is described.
Tutorial
The main goal of this technique is to inject binary files (such as executables) to a Windows 10 machine with Powershell enabled.
For the whole process, in addition to the Ducky, a second machine is also needed. Surely the procedure can be run on a Windows with python, but in this case we used Linux.
The complete inventory is:
- The Windows 10 target machine.
- The auxiliary Linux machine.
- The USB Rubber Ducky.
For the example in this tutorial, a legitimate Windows 10 executable extracted from another machine running the same version of Windows was used.
Here are the steps:
- Choose the binary file you want to inject, for example: hostname.exe
C:WindowsSystem32hostname.exe
For the first test, it is recommended that the executable file should be one extracted from other machine with the same Windows version of the target machine.
- Copy the binary file to a Linux machine.
Through the network, USB, etc.
- On the Linux machine, run the python script (bin2duck) that reads the binary file and creates the script file in the USB Rubber Ducky language:
$bin2duck.py -i hostname.exe -m 2
a text file named ‘inj.hostname.exe‘ will be created. The file will have a format similar to this one:
DELAY 2000
STRING # Reading xxx bytes
ENTER
STRING $start=date
ENTER
STRING # Progress: 0%, 0 bytes
ENTER
STRING $bytecodetemp = $bytecodetemp + 77,90,144,0,....
ENTER
DELAY 200
STRING # Progress: 3%, 512 bytes
ENTER
STRING $bytecodetemp = $bytecodetemp + 128,18,0,0,....
ENTER
.
.
.
STRING # Progress: 100%, xxx bytes
ENTER
STRING $end=date
ENTER
STRING $start
ENTER
STRING $end
ENTER
STRING [byte[]] $bytecode = $bytecodetemp
ENTER
DELAY 200
STRING [io.file]::WriteAllBytes('inj.hostname.exe',$bytecode)
ENTER
- Encode the created file and generate USB Rubber Ducky injection file
$ducktools.py -e inj.hostname.exe -l mx inj.hostname.exe.bin
- Insert the USB Rubbar Ducky micro SD in the auxiliary machine
- Copy the injection file on the micro SD
$cp inj.hostname.exe.bin /media/.../inject.bin
Note: The target filename MUST be ‘inject.bin’.
- Unmount the micro SD
$umount /dev/sdX1
- Remove the micro SD and insert it into the USB Rubber Ducky
- Go to the target machine
- Start a Windows command window (Win+r, Start > Run > cmd.exe, etc.)
- With the cursor in the command window, insert the USB Rubber Ducky into the target Windows 10 system. The USB Rubber Ducky will start ‘typing’ as indicated in the inject.bin:

Fig. 2. inject.bin execution.
- Wait until the process is finished and the file is created, in this case: hostname.exe.
This process will take several minutes depending on the file size. According to our tests, the speed is between 30 and 60 bytes/second. This means that injecting a 1MB file would take, with this technique, between 5 and 10 hours… But if there is no other way to do it and the equipment is available for more than 5 hours, it is worth it…
Warning: During the process you can NOT touch the mouse or the keyboard, because if you change the focus, the Ducky will continue typing where the focus is and can ruin the variable generation process (besides typing anything in another application). It must be remembered that the device is emulating a typing person.

Fig. 3. Target machine binary file creation.
- Run the newly created executable file. In this case both were tested: the original hostname command, and the injected file: inj.hostname.exe file.

Fig. 4. Target machine binary file execution.
If the file is too large you can compress it (e.g. as a .zip file), send the .zip file as a binary via the USB Rubber Ducky, and then unzip it on the target machine.
Summary
Attacks to isolated or air-gapped machines are very limited. The limit is even worse if the machine has USB storage devices and external booting disabled. So, the only way to carry out an attack is by the keyboard port.
A procedure and a script to inject binary files into a Windows 10 machine via the keyboard emulator USB Rubber Ducky were created. Different binary files e.g. .exe and .zip files were successfully injected. Executable injected files were successfully executed.
Acknowkedgements
I would like to thank the Platinum Ciber technical team that participated in this initiative. They are: Alejandro Diaschi, Facundo Keller, Santiago Sarchetti and I want to specially mention Maykel Camargo who gave me the idea of using the USB Rubber Ducky to inject “stuff” inside a machine by unconventional means.
I hope you enjoy it!
Post by Carlos Benitez